FL Studio 20 Time Stretch – Get Your Samples to Fit the Tempo (2022)
Learning how to time stretch in FL Studio 20 is a crucial part of your music production journey, as it is a hugely beneficial tool for sampling and manipulating sounds.
However, if you don’t know what you’re doing, time stretching in FL Studio can become one of the most fiddly, irritating processes you’ll come across.
Today we’re going to look at the quickest, easiest way to time stretch in FL Studio 20. With the right knowledge on how to time stretch your sounds, FL Studio 20 actually makes this process very easy and intuitive. So let’s dive right in.
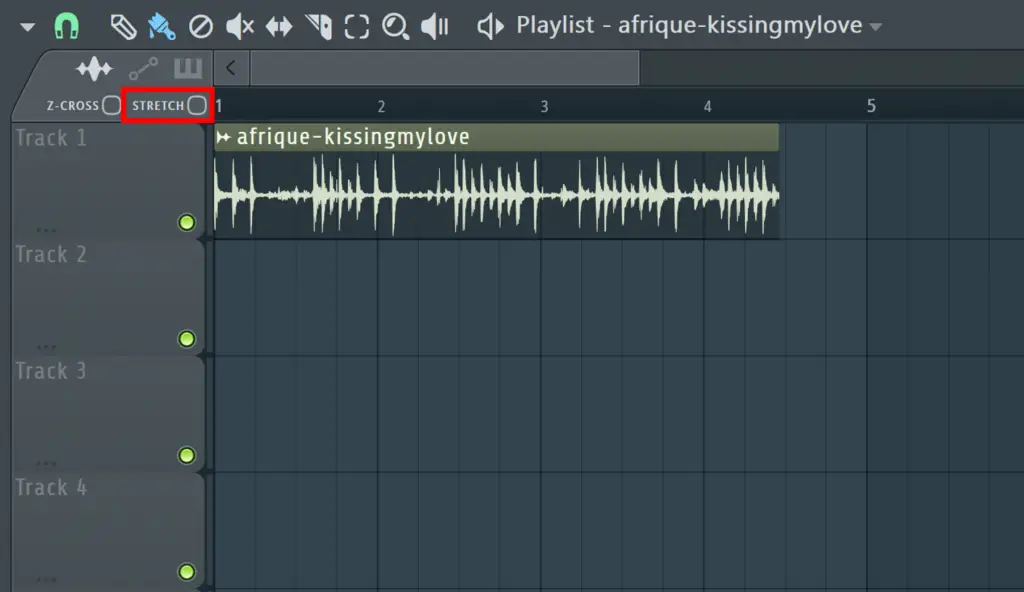
FL Studio 20 Time Stretch – Stretch Toggle Button
One of the easiest ways to stretch a sample within FL Studio is to use the stretch toggle button, located in the top left of the browser view (shown above).
Firstly, make sure you have an audio file within the playlist section. You can do this by either dragging and dropping a file from the left hand browser or directly from your documents.
Next, make sure this stretch button is selected. This will allow you to grab the ends of your sound in the playlist section and time stretch the audio using the paint tool.
You may notice the audio “snaps” in specific increments when you are dragging it. To fix this, hold down Option or Alt, which will smooth out the time stretching. This allows you to stretch the audio to any point of your choosing.
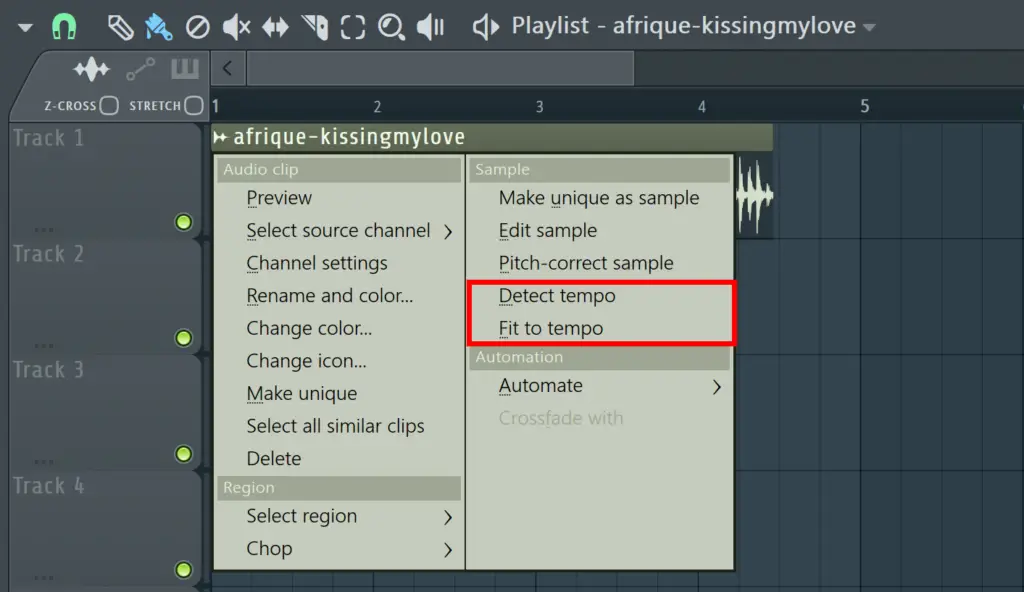
Fit Tempo Tool
Another way to time stretch your sound is to use the Fit Tempo option in FL Studio 20. This is a more automatic way to stretch the sounds to a specified tempo.
To explore this option, click on the small waveform icon in the top left of your sound, and you’ll notice the options Detect Tempo and Fit Tempo.
Detect Tempo can be used to detect the tempo of your chosen sound. This works best for drum or percussion samples, and is less effective for other instrumental or vocal samples.
Fit to Tempo can be used when you know the tempo of the sound you want to time stretch to fit the set tempo in FL Studio.
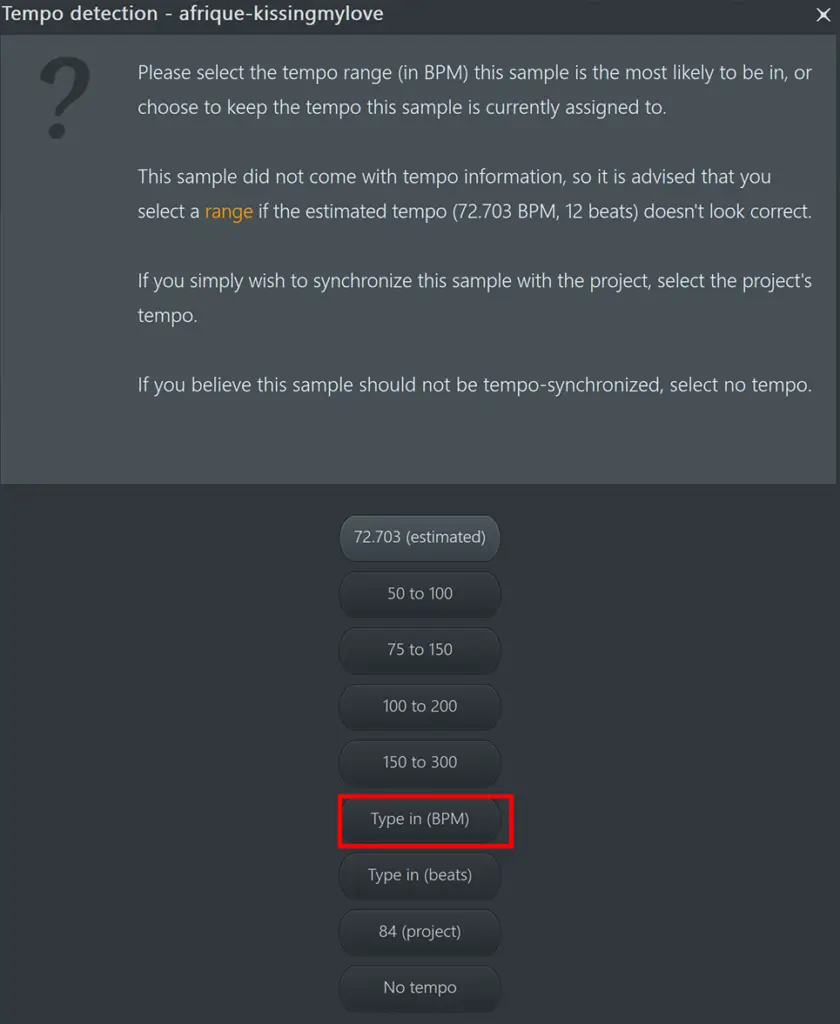
Select this option, and click Type In (BPM). Then type in the tempo of the sound (you may use the detect tempo option to find this value, or you may already know the tempo). Hit enter, and this will automatically stretch the sound to fit the tempo in FL Studio.
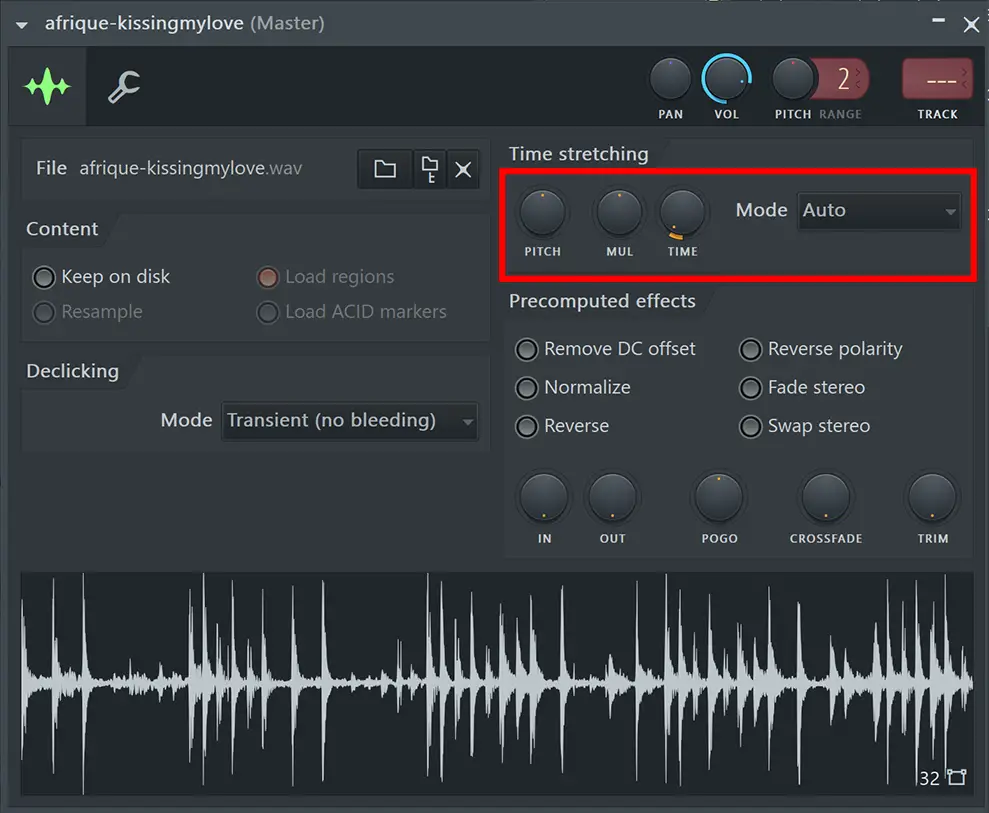
Time Stretching Modes
There are various modes you can select within FL Studio 20 that will change the nature of the time stretch, and therefore change the texture of the resulting sound.
First, double click on your sound. This will bring up the window shown above, which includes a small Time Stretching section.
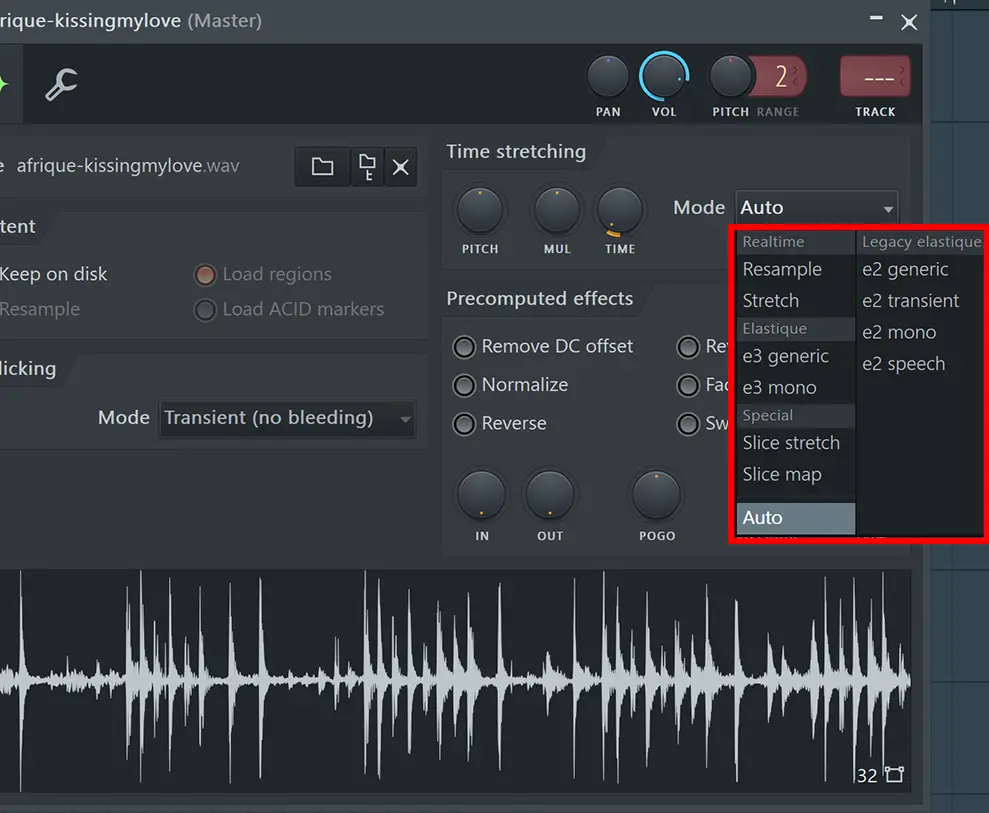
The Mode feature gives a drop-down menu with various stretching mode options. Have a play around with a few of these options, and notice how they alter the timbre and character of the sound. This is because you are essentially changing the nature of how the sound is being stretched.
Now, I’m not going to go through every mode in this menu, but it’s definitely beneficial to point out a few key options, and where they might be the most effective.
Realtime > Resample – This will simply stretch the file in the same way as a record player would slow down / speed up a sound, hence pitch will be affected. This is useful for samples where pitch alterations aren’t detrimental to the resulting sound.
Elastique > e3 Generic – This option allows you to stretch your sound without altering the pitch, and is perfect for time stretching vocals or instruments such as guitar or piano.
Special > Slice Stretch – This option is particularly useful for looped drum samples, as it aims to preserve the timbral qualities of each “slice” of audio. The results are a little hit or miss, but this is often the best sounding option for drum sounds.
And there you have it. The quickest way how to time stretch in FL Studio 20. Why not check out some of our other guides and tutorials to FL Studio 20, a huge range of VST plugins and sample packs.
How to Time Stretch – Fl Studio 20: Similar Articles
How to Cut Samples FL Studio 20
How to quantize in FL Studio 20

